
|
Example: Handling fees with custom fields |

|

|

|
||
|
Example: Handling fees with custom fields |
|
|

|

|
Example: Handling fees with custom fields
|
Example: Handling fees with custom fields |
|
|
|
||
|
Example: Handling fees with custom fields |
|
|
|
|
The custom fields in the WebReserv booking system makes it really easy to add additional options, such as a pet fees. This example shows you how to create a custom field for pet fees, how to assign it to your room(s) and finally how it will show up on the booking calendar.
Step 1. Create the custom field.
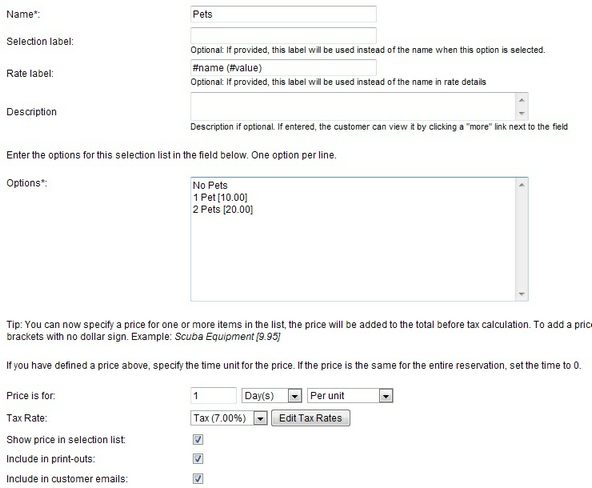
Go to Setup – Custom Fields and click add new custom field. Select List as the custom field type and click Continue. You are now on the main custom field definition page.
- In the name enter Pets or a similar name for the custom field.
- We allow for a maximum of 2 pets. Since many customers won’t have any pets at all, we’ll enter 3 options in the options field: No Pets, 1 Pet and 2 Pets. The options field also allow us to enter a price (if selected). In this case we charge $10 per pet per day, so we enter [10.00] on the line for one Pet and [20.00] on the line for two pets.
- We also have to specify that the rate is per day. By default, the booking system assumes that the price is for the entire stay, regardless of length. To change the charge to be per day, change the Price is for to be 1 day(s) – per unit. This instructs the system to charge 10 (or 20) per day per room.
Your custom field should now look like this:
Step 2. Assign the custom field to your products/rooms
After saving the custom field, we have to assign it to one or more products/rooms. This tells the system to include the Pet custom field on the booking calendar. To go Setup – Products & Reservation rules and select the first product/room where you want the Pets custom field to be included. In the left-hand menu, select Customer Information and scroll down to the bottom. Here you’ll find the custom fields. Set the Pets field to optional.
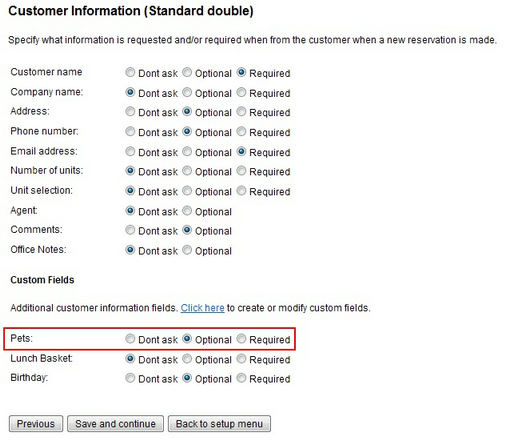
Click save and continue.
Step 3 – Validate the custom field.
To validate that your custom field is working, go to your booking calendar and select the product/room you just modified. Check that the Pets field is included.
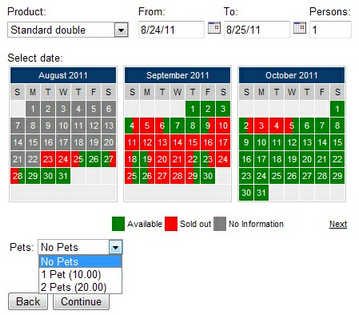
You are done. That was easy right?
Tip: By default, custom fields will show on a separate page called Additional Requests. You can group custom fields on the date/time page (as shown in the example above) or you can group custom fields on the customer information page. To modify the custom field groups, go to Setup – Custom Fields and click the link to customize the display order.