
|
Initial Setup |

|

|

|
||
|
Initial Setup |
|
|

|

|
Initial Setup
|
Initial Setup |
|
|
|
||
|
Initial Setup |
|
|
|
|
When you first log on to your WebReserv account, you will be greeted with a setup wizard that will take you through the initial setup steps for your account. The setup has 5 steps and will normally not take more than 15 minutes.
Tip: Before you start, we recommend that you take a look at our Quickstart guides. You can find our Quickstart guides on the WebReserv portal:
http://www.webreserv.com/articles.do
Step 1 - Business Information
On the first setup screen, you will enter the business information - business name, address, phone number, email address and website address. Make sure that you get the email address correct. This is the email address that will receive email notifications whenever a new reservation is made.
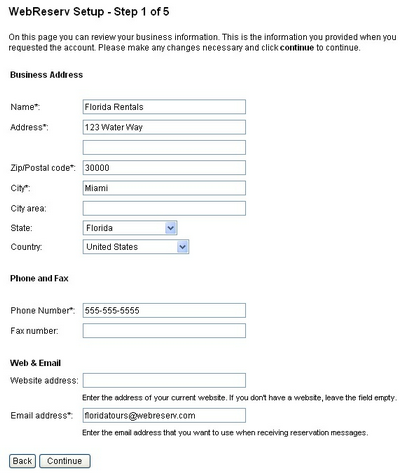
Step 1 - Business Address
Step 2 - Business Category
On this page you specify your business category. Make sure you get the business category correct. The booking system use this information to determine how to handle your bookings and how your business will be presented on the WebReserv portal. If you cannot find the exact category for your business, select the closest category and contact our support to have your business category added.
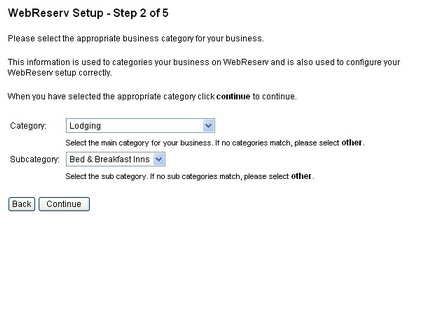
Step 2 - Business Category
Step 3 - General booking settings
On this page you specify general booking settings. These settings help the booking system determine how to manage your reservations. Depending on your business category, you may not need to specify these settings as WebReserv has already determined the best setting based on your category.
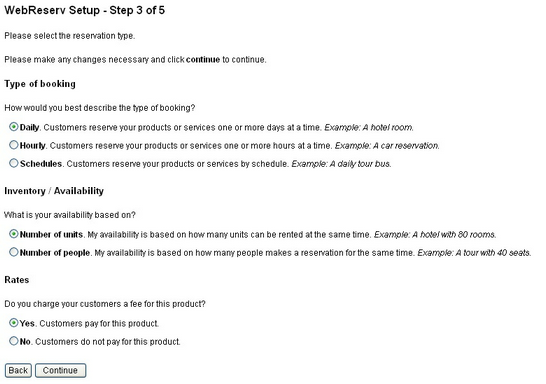
Step 3 - General Booking Rules
Step 4 - Rates
On this page you can enter rates for your products/rooms/vehicles. You can enter up to five different rate periods, for example, hourly/daily/weekly/monthly or any other rate schedule of your choice. Some business may have more detailed rules than what can be entered here. Don't worry, just enter as much or as little information as you can - it is easy to change the rates later one and add more rate periods.
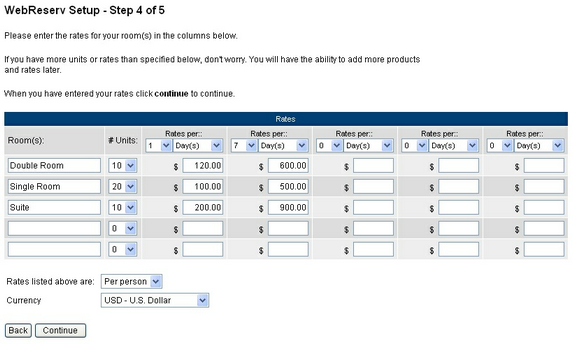
Step 4 - Rates
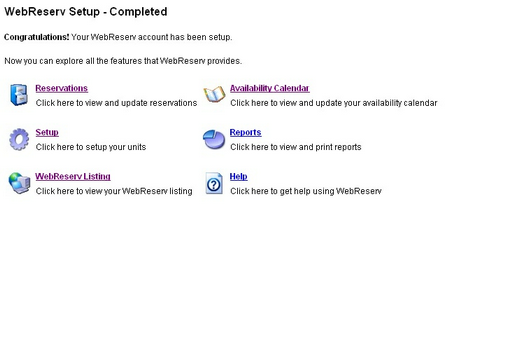
Step 5 - Setup complete
Congratulations! Your WebReserv account has been configured. You can now test out some of the many features in the WebReserv system or continue to the regular setup for more setup options.
Step 5 - Setup Complete