|
Adding the Booking Calendar to your website |

|

|
|
|
Adding the Booking Calendar to your website |
|
|
Adding the Booking Calendar to your website
|
Adding the Booking Calendar to your website |
|
|
|
|
Adding the Booking Calendar to your website |
|
|
Once you have set up your inventory and rates in the system, next you will configure and add the booking calendar to your website. This is a simple process that doesn't involve a technical background to achieve. We will discuss how below.
Access the Booking Calendar
To access the booking calendar features in your WebReserv account, click on the Website tab in top menu. This will default to the Booking Calendar page.
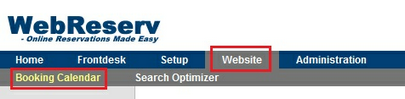
Website tab
On this page, you can customize, preview, and access the HTML code needed to add the calendar to your site.
Customize
The calendar options in this section allows you to customize the look of the booking calendar. See custom options below.
| ▪ | Version |
| ▪ | Style |
| ▪ | Search |
| ▪ | Availability/Rate Grid |
| ▪ | Appearance |
Booking calendar Version 2.0 and the Embedded style option are the most popular choices and the default options. When the user views the calendar, they will stay on your website, and will see the booking calendar inside your website.
Embedded Booking Calendar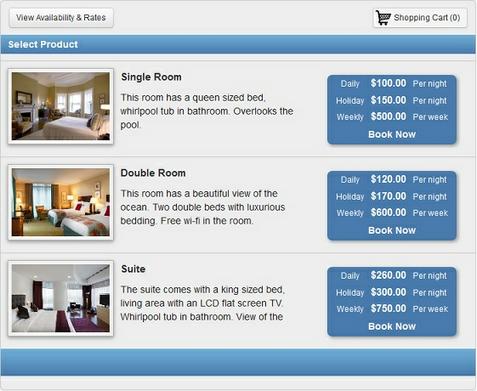
Search
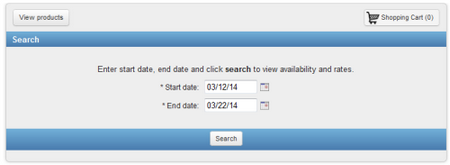
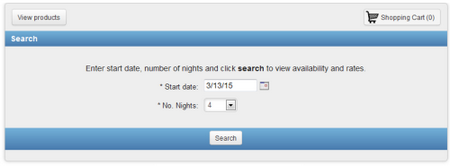
The Booking Calendar gives you a few search options to choose from: No Search, Start/end date, No. Nights, No. Days. No Search is the default option and customers will see the listing of your products as the first view of the booking calendar. Choosing another search option will show the search as the first view of the booking calendar, see examples below.
Start/end date view:
No. Nights:
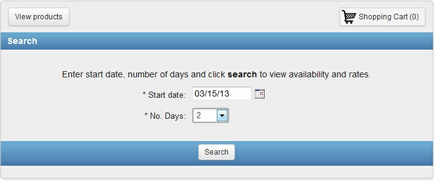
No. Days:
Availability/Rate Grid
This option, if set to yes, will allow customers to see a view of all your inventory and rates for a week at a time. On the first page of the booking calendar, your customers can click on "View Availability and Rates" button to see the grid view. Customers can also choose a date and see availability for that week.
See example below:
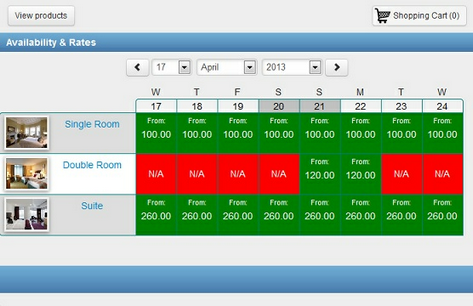
Availability/Rate Grid
Appearance
The Booking Calendar comes with many options for color themes. Choose one from the list or create your own. To learn about customizing the colors, see the section on Defining styles and colors. The default color theme looks like this:
Default color theme
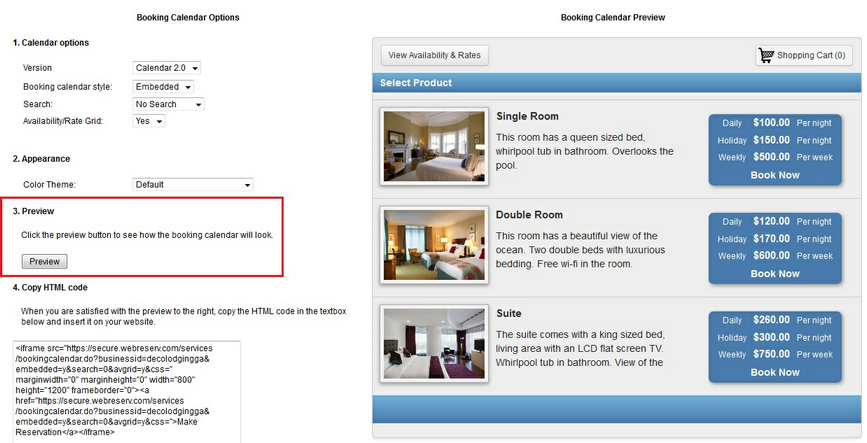
Preview
After selecting the options that you want, click the Preview button and a preview will be shown on the right side of the screen. If necessary, you can change the options and click Preview again to see how different settings affect the booking calendar.
Adding the booking calendar code to your website
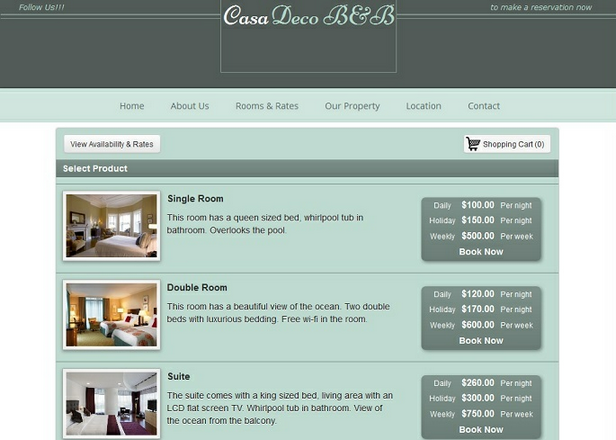
When you are done customizing the booking calendar, copy the HTML code from the section 4 - Copy HTML code, and paste the HTML code into your website editor at the place where you want the calendar.
Congratulations - you have now completed the booking calendar customization and setup process.
For more information. . .
Overview of the Booking Calendar
Advanced booking calendar features