|
Example: Pickup/Dropoff location |

|

|
|
|
Example: Pickup/Dropoff location |
|
|
Example: Pickup/Dropoff location
|
Example: Pickup/Dropoff location |
|
|
|
|
Example: Pickup/Dropoff location |
|
|
This example shows how a business can include a pickup or drop off location using a Custom Field.
How to Setup with Custom Field
You will choose the List custom field type to set up a pickup/dropoff location. In the Options box, enter the locations, one on each line.
Your custom field setup will look like this:
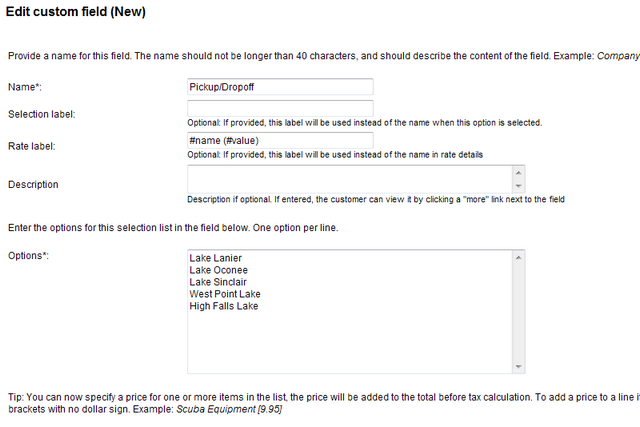
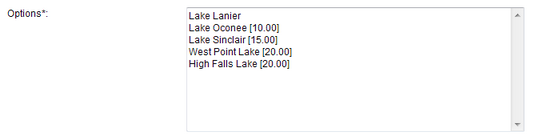
If you charge a surcharge for pickup/dropoff, you can add it to the list by entering the surcharge in square brackets. Do not include a currency sign such as $, € or £.
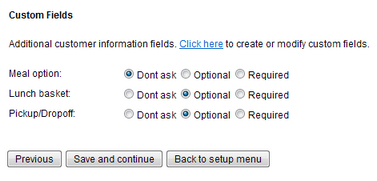
How to associate the Custom Field to your room/rental/tour
After saving the custom field, you have to assign it to one or more products/rentals/tours. This tells the system to include the Pickup/Dropoff custom field on the booking calendar.
Go to Setup – Products & Reservation Rules and select the first product/rental/tour where you want the Pickup/Dropoff custom field to be included. In the left-hand menu, select Customer Information and scroll down to the bottom. Here you’ll find the custom fields. Set the Pickup/Dropoff field to Optional.
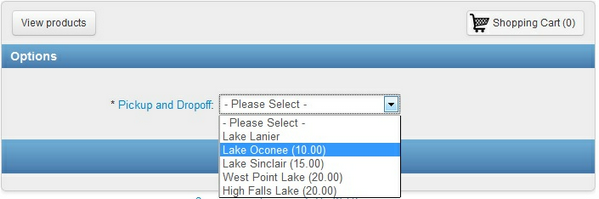
How Custom Field is shown in the booking calendar
To validate that your custom field is working, go to your booking calendar and select the product/room you just modified. You will see the next page, Options, include the Pickup and Dropoff custom field you created.
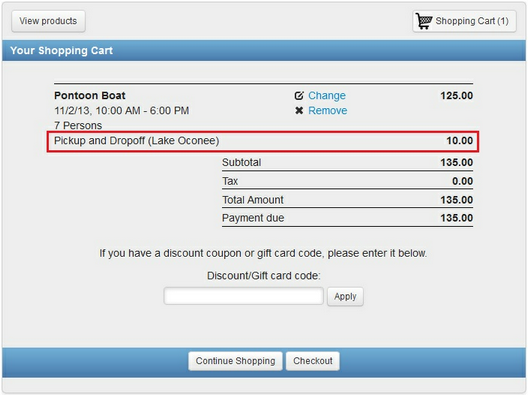
How the Custom Field is shown in the Shopping Cart
The Shopping Cart will show the custom field information and add the additional fee onto the total reservation cost.
For more information. . .
Custom Field Example: Handling fees